패키지명 - 일반적으로 웹 사이트 주소의 역순. admin.moong.com이면 패키지명은 com.moong.admin
🔽Application.java (main 안의 패키지 안에 생성)
import org.springframework.boot.SpringApplication;
import org.springframework.boot.autoconfigure.SpringBootApplication;

@SpringBootApplication
public class Application {
    public static void main(String[] args) {
        SpringApplication.run(Application.class, args);
    }
}
@SpringBootApplication
: 스프링 부트의 자동 설정, 스프링 Bean 읽기와 생성을 모두 자동으로 설정. 얘가 있는 위치부터 설정 읽어가기 때문에 이 클래스는 항상 프로젝트 최상단에 위치해야.
SpringApplication.run
: 내장 WAS(Web Application Server) 실행. (내장이라 서버에 톰캣 설치할 필요 없음. 스프링 부트로 만들어진 Jar 파일 (실행 가능한 Java 패키징 파일)로 실행하면 됨.
언제 어디서나 같은 환경에서 스프링 부트를 배포할 수 있기에 내장 WAS 사용 권장.
🔽main/패키지/web/HelloController.java
import org.springframework.web.bind.annotation.GetMapping;
import org.springframework.web.bind.annotation.RestController;

@RestController
public class HelloController {
    @GetMapping("/hello")
    public String hello() {
        return "hello";
    }
}
@RestController
: JSON 반환하는 컨트롤러로 만들어줌
@ResponseBody를 각 메소드마다 선언했던 것을 한 번에 사용할 수있도록 해줌
@GetMapping
: HTTP Method인 Get의 요청 받을 수 있는 API 만들어줌. /hello로 요청 오면 문자열 hello 반환함.
@RequestMapping(method = RequestMethod.GET)이었던 거 일케.
🔽/test/패키지/web/HelloControllerTest.java
import org.junit.Test;
import org.junit.runner.RunWith;
import org.springframework.beans.factory.annotation.Autowired;
import org.springframework.boot.test.autoconfigure.web.servlet.WebMvcTest;
import org.springframework.test.context.junit4.SpringRunner;
import org.springframework.test.web.servlet.MockMvc;
import static org.springframework.test.web.servlet.request.MockMvcRequestBuilders.get;
import static org.springframework.test.web.servlet.result.MockMvcResultMatchers.content;
import static org.springframework.test.web.servlet.result.MockMvcResultMatchers.status;
@RunWith(SpringRunner.class)
@WebMvcTest
public class HelloControllerTest {
@Autowired
private MockMvc mvc;
@Test
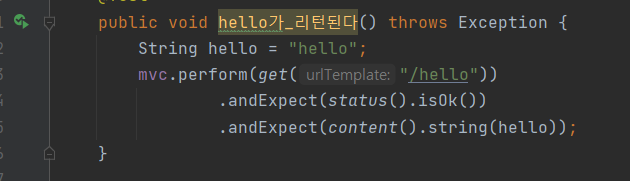
public void hello가_리턴된다() throws Exception {
String hello = "hello";
mvc.perform(get("/hello")) //MockMvc를 통해 /hello 주소로 HTTP GET 요청함
.andExpect(status().isOk()) //mvc.perform의 결과 검증 (status=200)
.andExpect(content().string(hello)); //mvc.perform의 결과 검증
}
}@RunWith(SpringRunner.class)
테스트 진행 시 JUnit에 내장된 실행자 외에 다른 실행자를 실행시킴
여기서의 다른 실행자: SpringRunner 실행자.
즉, 스프링 부트 테스트와 JUnit 사이의 연결자 역할!
@WebMvcTest
web(Spring MVC)에 집중할 수있는 어노테이션
사용 O: @Controller, @ControllerAdvice
사용 X: @Service, @Component, @Repository
@Autowired : 스프링이 관리하는 빈(Bean)(자바 객체)을 주입 받음
private MockMvc mvc;
웹 API 테스트(HTTP GET, POST 등에 대한)시 사용. 스프링 MVP 테스트의 시작점
.andExpect(status().isOk())
HTTP Header의 Status (200, 404, 500 등) 검증. OK: 200 검증
.andExpect(content().string(hello));
응답 본문 내용 검증
Controller에서 "hello" 리턴해서 이 값 맞는지 검증
왼쪽 화살표 눌러 run 하려고 했더니 에러 발생..~~
❓🔫Trouble Shooting!
- test events were not received
- File -> Settings ->Build,Execution, Deployment -> Build Tools -> Gradle
- here in the
Run test using:dropdown selected option was:Gradle(default)changed it toIntelliJ IDEA
- 롬복 테스트 실패
- gradle 다운그레이드로 해결
- alt+F12 (윈도우/맥 동일) 키로 해당 프로젝트 기준으로 터미널 생성
- gradlew wrapper --gradle-version 4.10.2
- gradle 다운그레이드로 해결
- build.gradle의 dependencies 안의 compile 경로 잘못 설정
compile('org.springframework.boot:spring-boot-starter-web')로 고침
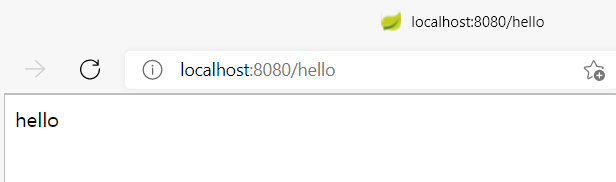
Run Application.main() 해보면 8080 포트에서 실행됐다는 로그 출력됨!
🌟 브라우저로 한 번씩 검증은 하되, 테스트 코드는 꼭 따라해야!
🌟 절대 수동으로 검증한 후 테스트 작성 금지. 테스트 코드로 먼저 검증 후 정말 못 믿겠으면 프로젝트 실행해 확인!
'WEB > SPRING' 카테고리의 다른 글
| [SPRING] 기존 Controller 코드를 롬복으로 전환 (0) | 2021.10.07 |
|---|---|
| TDD와 단위 테스트, 테스트 코드 (0) | 2021.10.05 |
| [SPRING] 인텔리제이로 스프링 부트 시작하기 (0) | 2021.10.04 |
| MVC 웹 프레임워크와 DJANGO MTV (0) | 2021.10.03 |
| REST API와 CRUD (0) | 2021.10.03 |


댓글